Scan SharePoint tutorial
!!! For this to work, you must have an account synced with Azure AD !!!
To be able to post in the organization's SharePoint site, the following permissions must be added to the Gespage app created on Azure:

To scan to SharePoint, we'll need two things.
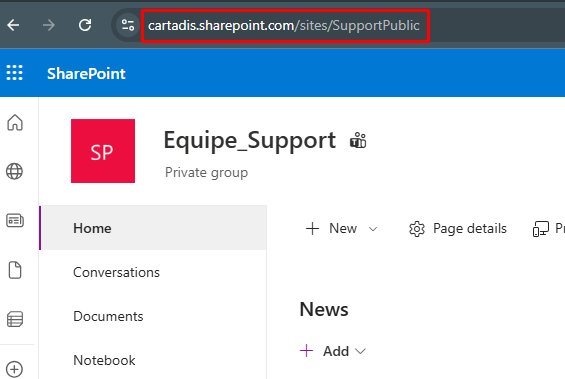
- The first is the URL of your SharePoint site:
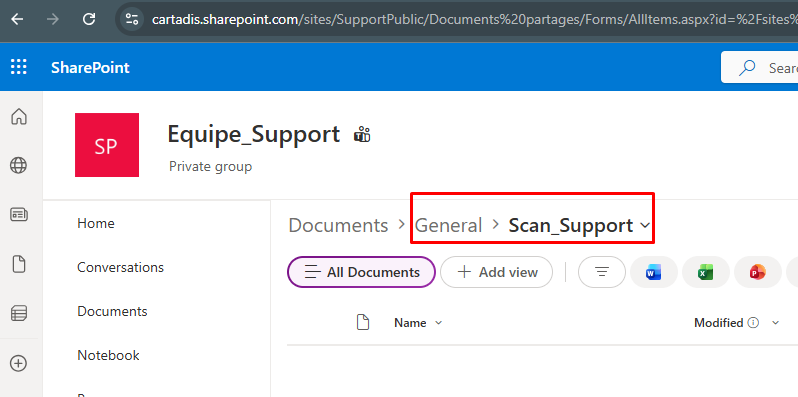
- The second item will be the path to the shared folder (be careful not to select “Documents,” which is the SharePoint root):
Once you have these two items, you can create the scan profile for SharePoint.
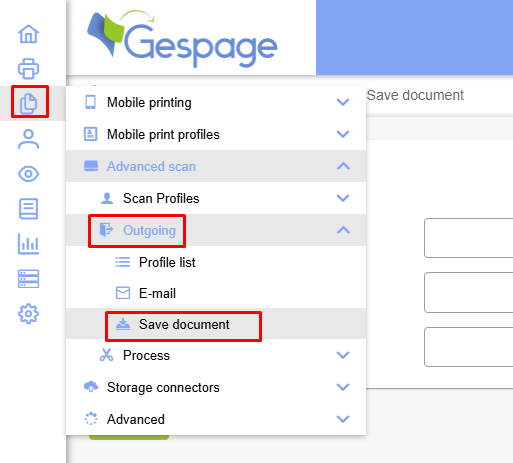
Go to Outbound Flows to add a document storage:
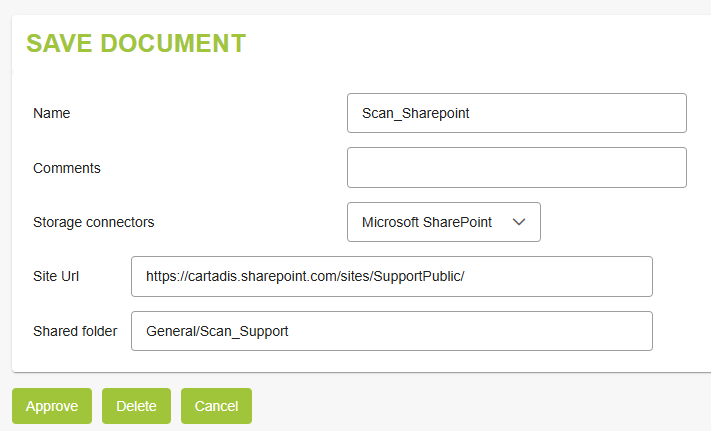
Select the SharePoint storage connector, then enter the information you retrieved earlier:
Next, you need to configure a Gespage scan profile that includes this outbound stream:
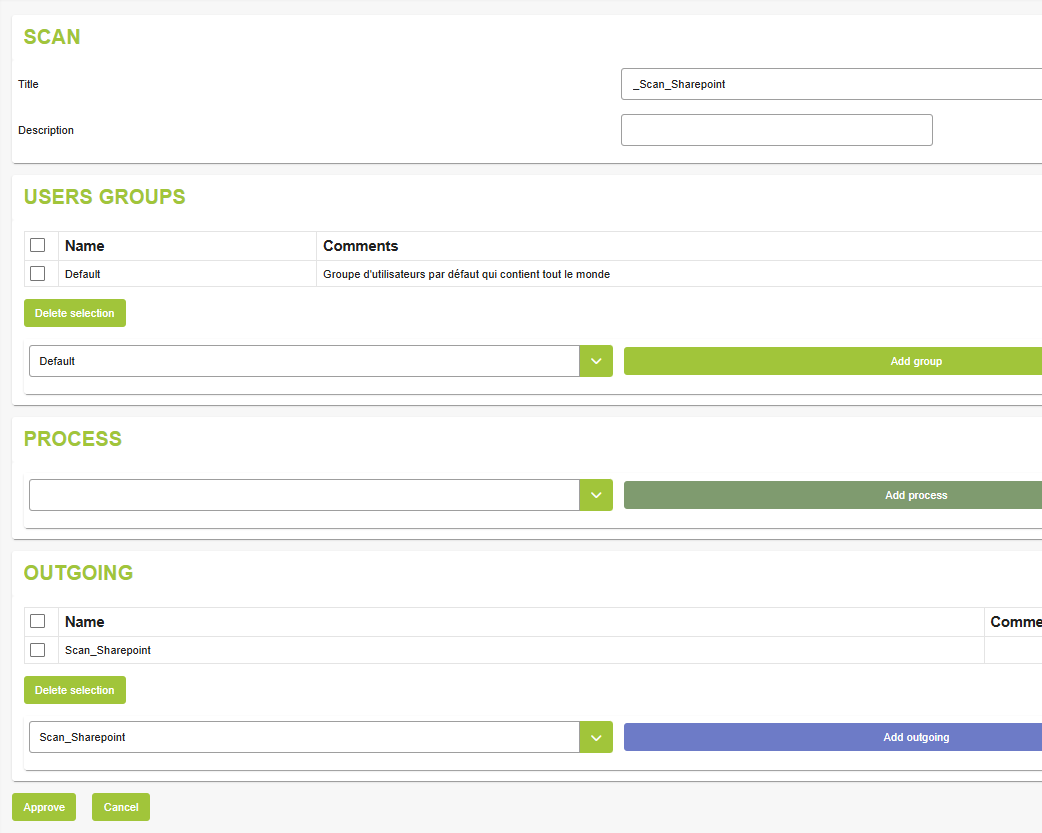
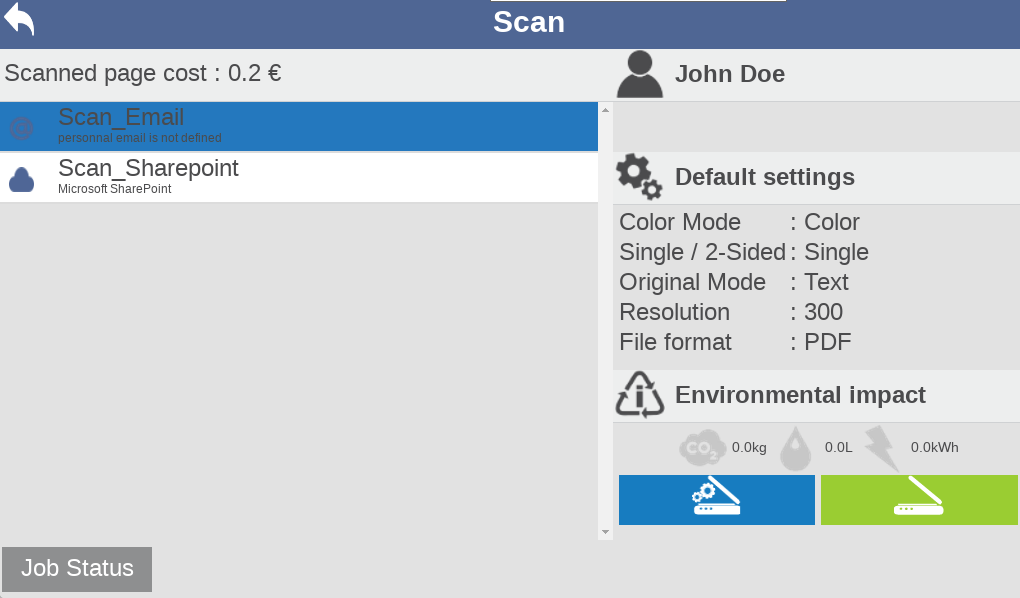
When the user logs in, they will be able to scan the added folder. Of course, you can create multiple SharePoint outbound feeds in Gespage based on folders and permissions on the shares:
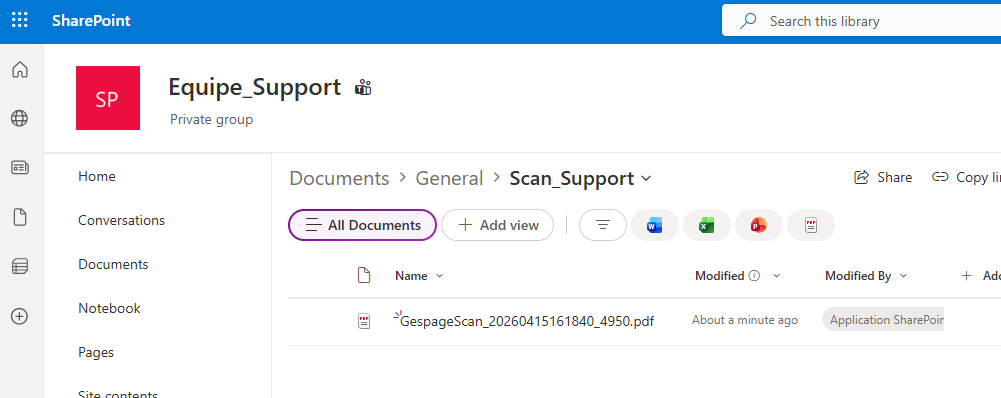
Once scanned, the documents will appear directly in the folder:
Was this article helpful?
That’s Great!
Thank you for your feedback
Sorry! We couldn't be helpful
Thank you for your feedback
Feedback sent
We appreciate your effort and will try to fix the article